Tie Dye Patterns for beginners, intermediate and expert levels.
Spider Tie Dye Design
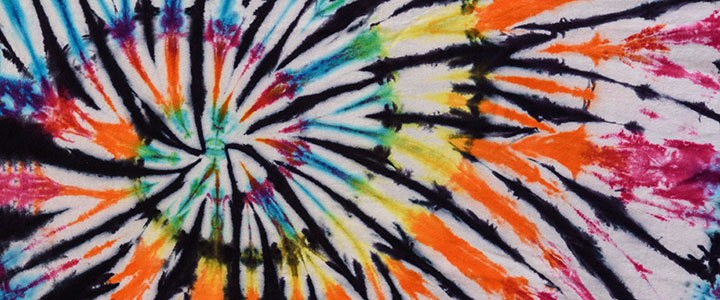
The Spider Tie Dye pattern is a variation of the classic Spiral Tie Dye pattern. To the untrained eye, it could easily be mistaken for a Spiral. The thing that makes it distinct is that you intertwined with the rainbow pattern is a single color that appears in thinner lines between each rainbow color segment. As with the Spiral, the Spider looks complex, but it’s easy. It’s just one more step.
This design pattern is suitable for beginners. Variations include the placement of the center of the spiral. You can focus the center of the spiral in different places to create different final designs.
- Lay your shirt out flat on your covered working surface.
- Use your fingers (or even a fork) and pinch the fabric of the shirt at the starting point, which will be the center of your spiral
- Twist the shirt from the center point and spin until the entire shirt is shaped like a round disc.
- Add rubber bands around the disc shape to form pie like segments. 3 rubber bands will create 6 segments. 4 rubber bands will create 8 segments.
- Apply dyes to the different segments to create your design, creating pie like shapes with each color.
- Flip the disc shaped shirt over and lightly apply a coat of a single color of dye over the entire surface of the disc shape.
- Using the darkest color in your palate for Step 6 is recommended, so that it covers the dye that has already been applied to the segments. Black, navy or dark red work great.
- If you are not heavy-handed with the dye in Step 5, you can also try using a lighter color in Step 6, like the photo of the version above.
To complete your design and shirt, follow the instructions listed on the Tie Dye Basics: Quickstart Guide page.
Leave a Reply